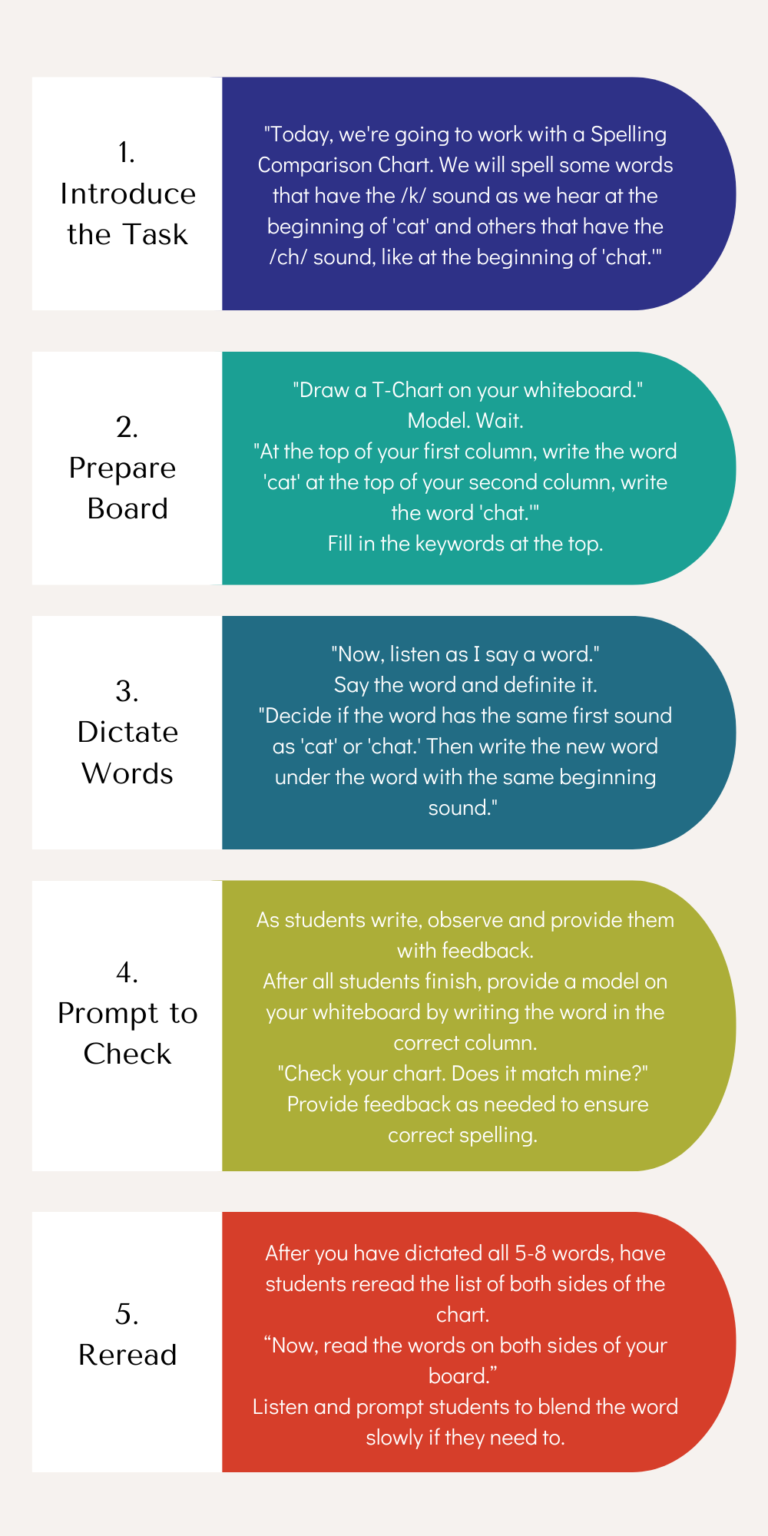
1. First, introduce the task to your students. It’s important that they know both what the work is and that it will help them grow as readers and writers!
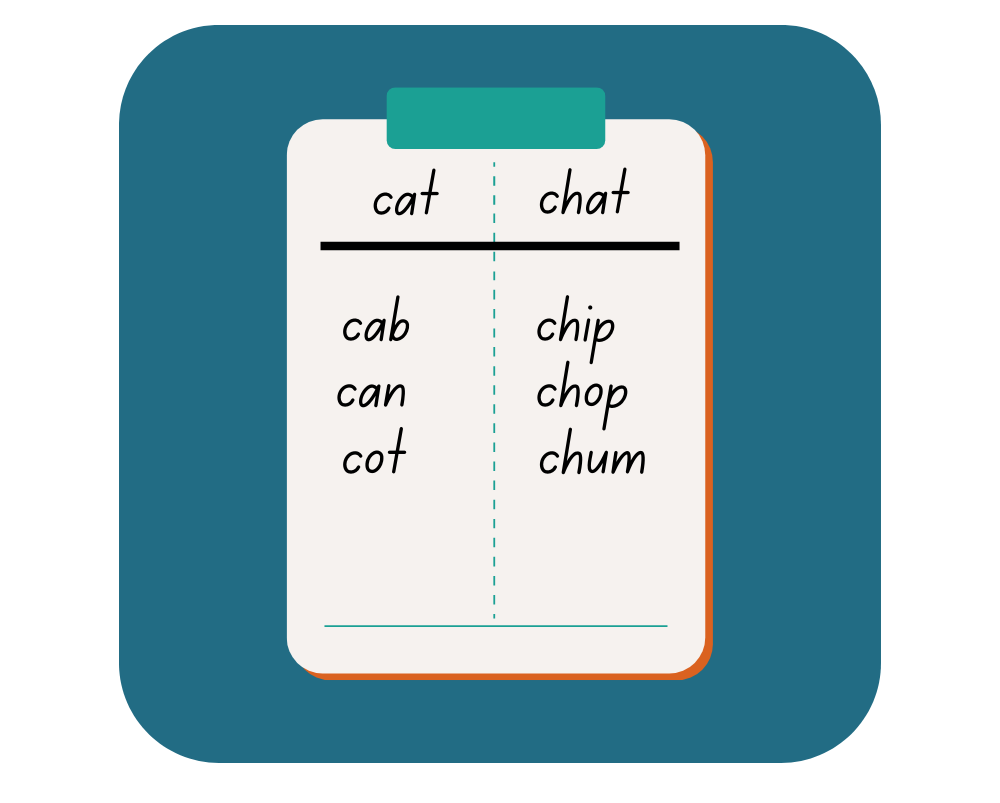
2. Make a T-chart on a whiteboard or chart paper and write the two comparison words at the top. Have students duplicate your T-chart, including the words. We love the functionality of whiteboards so students can easily erase and revise their work. But you can also tuck a paper T-chart template into a plastic sheet protector or even have students do the work in a word study notebook.
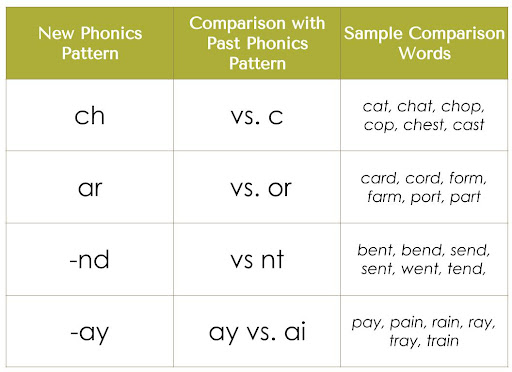
3. Next, dictate a word that fits one of the two patterns and define it. Then, ask students to compare the new word to the keywords at the top of the chart, actively listening to the sounds and considering what they know about spelling patterns. This will help them decide which of the two comparison words contains the same sound-spelling patterns. Students will write the new word in the appropriate column of the T-Chart.
Doing this work requires that students’ phonological and orthographic processing systems get involved as they segment, isolate the target sound-spelling, and compare the new word’s phonemes and graphemes to the keyword.
If your students are unfamiliar with this routine or need a model, you can dictate the first word and demonstrate the decision-making process aloud. Then, dictate the second word providing support as needed while they develop an understanding of the task.
4. Observe students as they write the new word on their T-charts. Do they have it in the correct column? Have they spelled it correctly? Provide feedback as they work to write the new word. With each new word that is added to a list, engage the whole group in reading both columns in unison.
*Repeat steps #1 – #4 with a new word. Continue the process for five-eight words.
5. Finally, your students will be ready to reread the list of dictated words on their own. Rereading gives your students independent blending practice. And all this mapping of the sound-spelling connections will help them build automaticity and confidence. This last step also lends itself to partner practice.
Thank you so much for your lessons and activities. I have been teaching for 30 years and your lessons have improved my instruction more than any curriculum. The solid research base provides a foundation each step. The lessons are sustainable and engaging for the students. Thank you for sharing your expertise!
We’re so glad to hear it. Happy teaching!
Thanks for yet another fabulous strategy that is sure to maximize the limited time that I have with my kids as an interventionist! Looking forward to trying “spelling comparisons” with my cuties!
Please, keep us posted. We’d love to hear how these procedures work for you and your students.
Thank you for all your dedicated work in helping our teachers shift their thinking and their responses to themselves and to others. Your model of explicit instruction with explicit language will help so many teachers take a leap of faith to try your work in their classrooms and keep coming back for more. Bravo!
Thanks, Suzanne. We’re all in this together. And our goal is to build bridges to make this work easier for teachers so that we can all make learning to read easier for children.